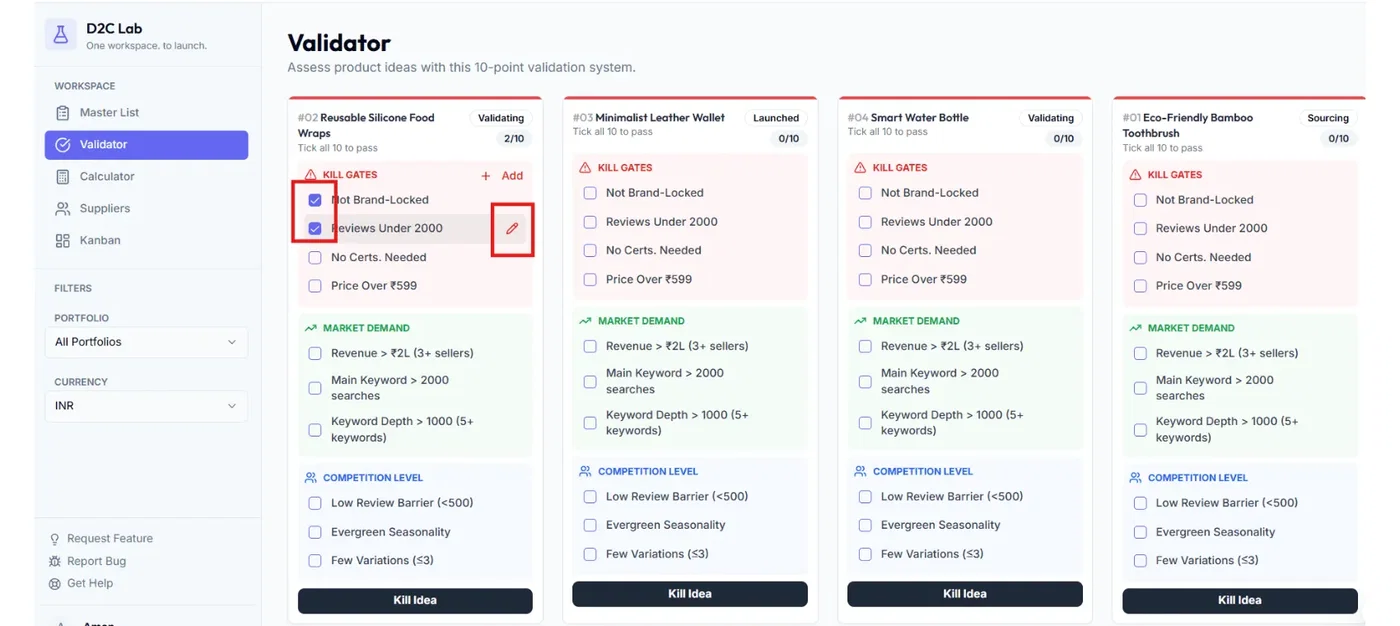
Validator: editing checklist items (add/edit/delete)
What you’ll learn
How to customize the Validator checklist:
add new checklist items
edit existing items
delete items you don’t need
Why checklist editing exists
Every brand has slightly different rules for what makes a product “worth it.”
The default checklist gives you a strong starting point, but you can adjust it so your Validator matches your real standards.
Where checklist items live
Open the Validator tab and find the idea card you want to work on.
Inside the card, checklist items are grouped into sections:
Kill Gates
Market Demand
Competition Level
Add a checklist item
Step-by-step
Open the idea card in Validator
Go to the section you want (Kill Gates / Market Demand / Competition)
Click Add item
Type the new checklist item
Save
Tip: Keep items short and specific. One clear decision per item.
Examples:
“Can we differentiate with one clear upgrade?”
“Is the target selling price realistic for this category?”
Edit a checklist item
Step-by-step
Hover over the checklist item
Click the Edit (pencil) icon
Update the text
Save
Tip: Don’t rewrite items into long sentences. Keep them scan-friendly.
Delete a checklist item
Step-by-step
Hover over the checklist item
Click the Delete (trash) icon
Confirm (if prompted)
Tip: Only delete items if you’re sure you’ll never need them. If you just want to pause an item, edit it into something more useful instead.
Where the buttons appear (hover behavior)
To keep cards compact, edit/delete icons and Add item typically appear only on hover.
If you don’t see them:
move your cursor over the checklist area,
or tap and hold on mobile (if supported).
Best practices (keep Validator clean)
Don’t add too many items. The goal is fast decisions.
Keep Kill Gates strict and minimal.
If you add a new rule, add it once and use it consistently.
Related articles
Validate with checklists (Validator)
Validator: checklist sections + completion colors
Kill gates explained (how to kill / revive quickly)