Validator: checklist sections + completion colors
What you’ll learn
How the Validator card is structured, what each checklist section means, and how the completion colors help you scan ideas quickly.
What the Validator is
Validator is where you quickly decide whether an idea is worth pursuing.
Each idea appears as a compact card with:
checklist sections, and
a top progress bar (completion indicator).
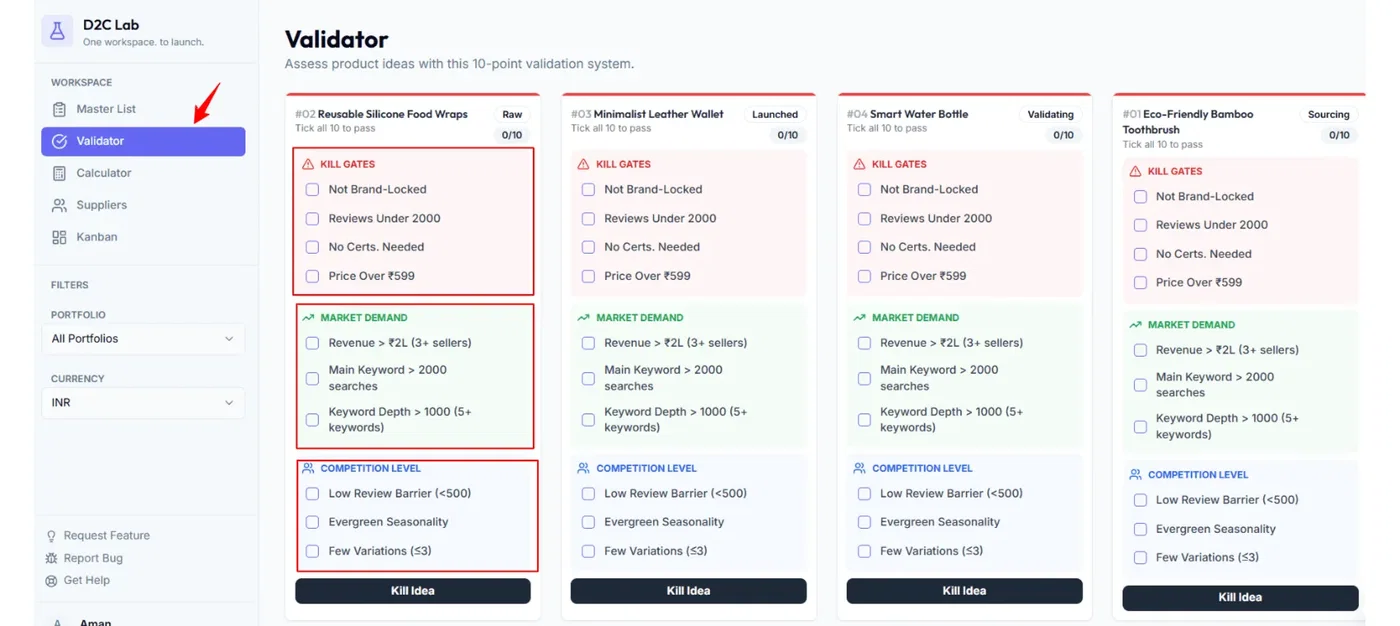
Checklist sections (what they cover)
Validator checklists are grouped into three sections:
1) Kill Gates
Your non‑negotiables.
If an idea fails here, you should usually kill it early and move on.
2) Market Demand
Checks that the idea has real demand and buying intent.
3) Competition Level
Checks whether you can realistically compete and differentiate.
Tip: Always start with Kill Gates first.
Completion colors (top accent bar)
At the top of every Validator card, you’ll see an accent bar that changes color based on checklist completion:
Red → 0 items checked
Yellow → partially checked (some items done)
Green → all items checked
Why it’s useful:
Red cards are “just ideas”
Yellow cards are “in progress”
Green cards are “ready to move forward”
How stages update automatically
Validator activity updates the idea’s stage for you:
When you start checking items, the stage moves from Raw → Validating
When all items are checked, the idea is ready to move forward to Calculator and then Suppliers/Kanban
Note: If you Kill an idea, the stage becomes Killed (it is not deleted and can be revived).
Best practices (fast validation)
Validate in 5–10 minutes per idea.
If it fails Kill Gates, kill it and don’t overthink.
Use the color bar to decide what to review next:
clear reds weekly
finish yellows
move greens into Calculator
Related articles
Validate with checklists (Validator)
Kill gates explained (how to kill / revive quickly)
Validator: editing checklist items (add/edit/delete)
Stages explained (Raw → Launched + Killed)