Validate with checklists (Validator)
What you’ll learn
How to use the Validator to quickly decide whether an idea is worth pursuing — using structured checklists, kill/revive, and clear progress indicators.
What the Validator is
Validator is your “kill bad ideas early” section.
Instead of guessing, you validate each idea using a checklist. The goal is simple:
Move forward only when the idea passes your checks
Kill ideas early so you don’t waste time on sourcing and samples
Where to find it
Go to the Validator tab.
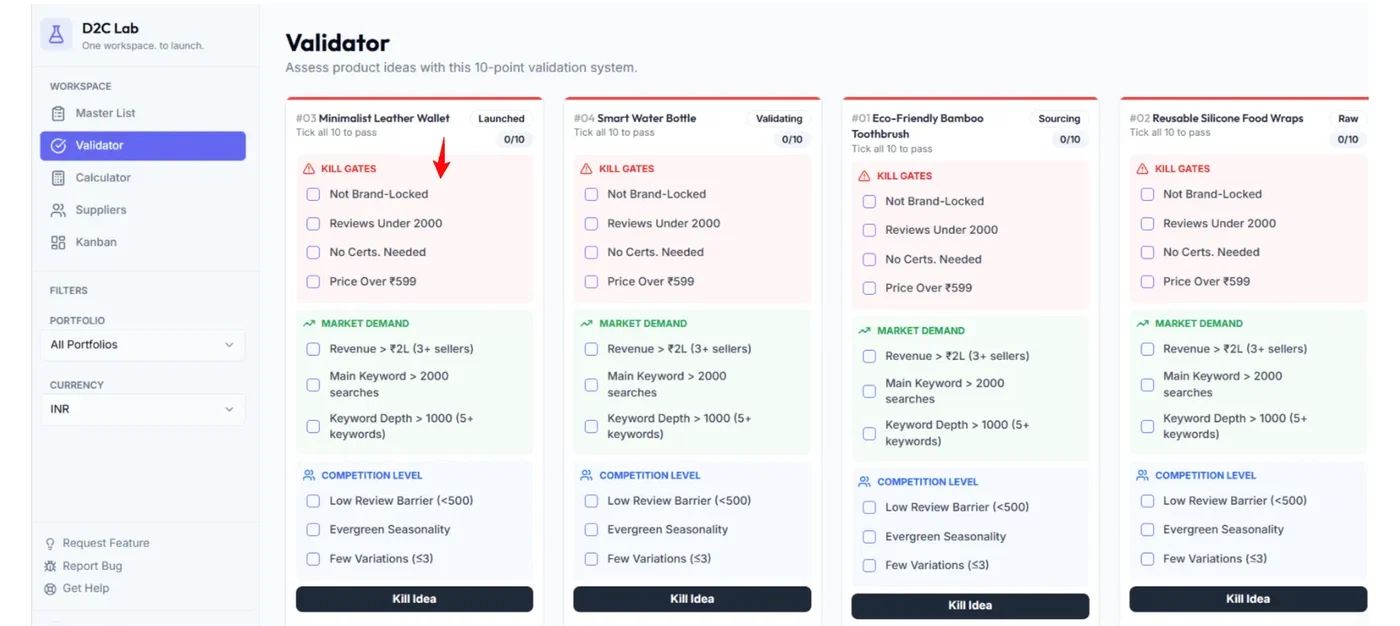
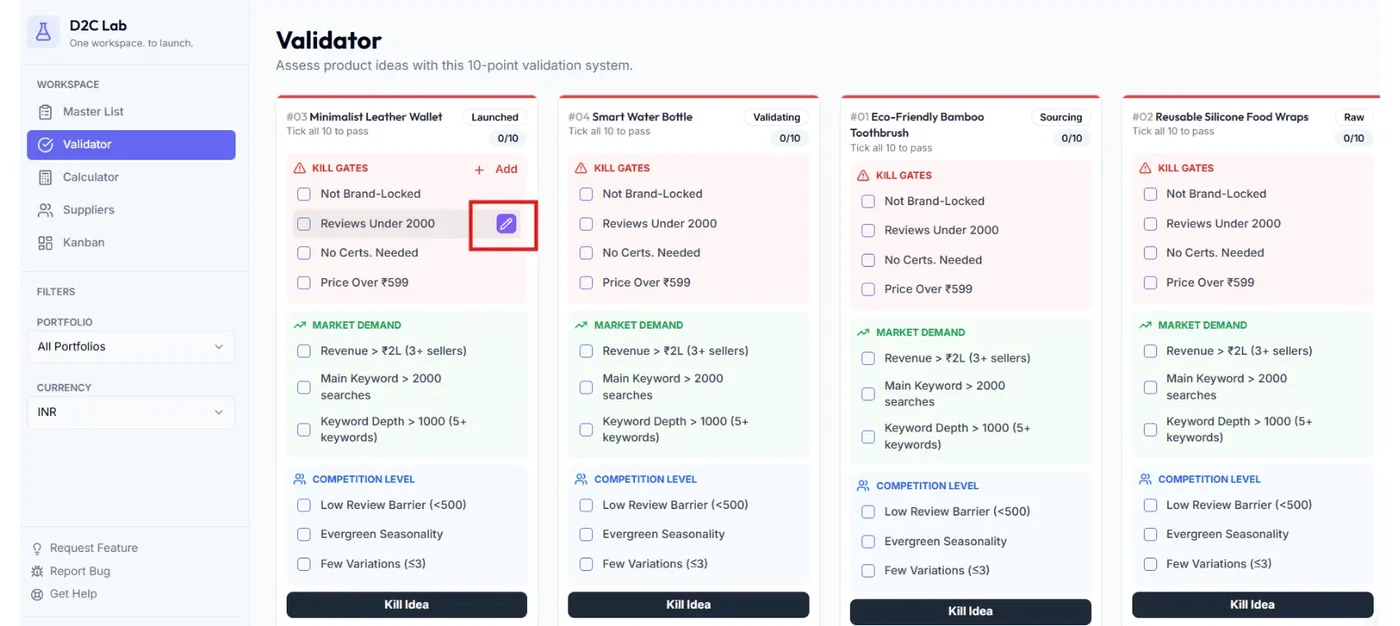
You’ll see all ideas in a grid of cards (no dropdown needed). Each card represents one idea.

How the Validator card works
1) Progress bar (color at the top)
Each idea has a top accent bar that changes based on checklist completion:
Red: nothing checked
Yellow: partially checked
Green: all checked
This makes it easy to scan which ideas are serious and which are still raw.
2) Checklist sections
Validator checklists are grouped into sections:
Kill Gates
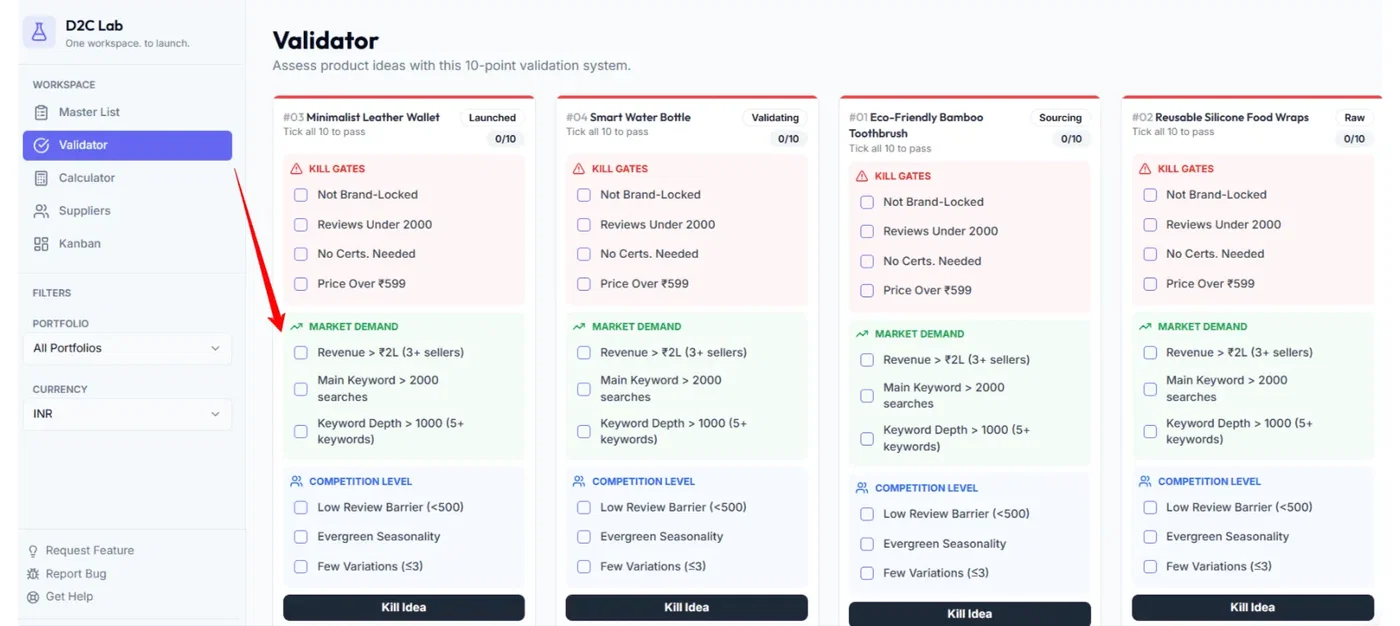
Market Demand
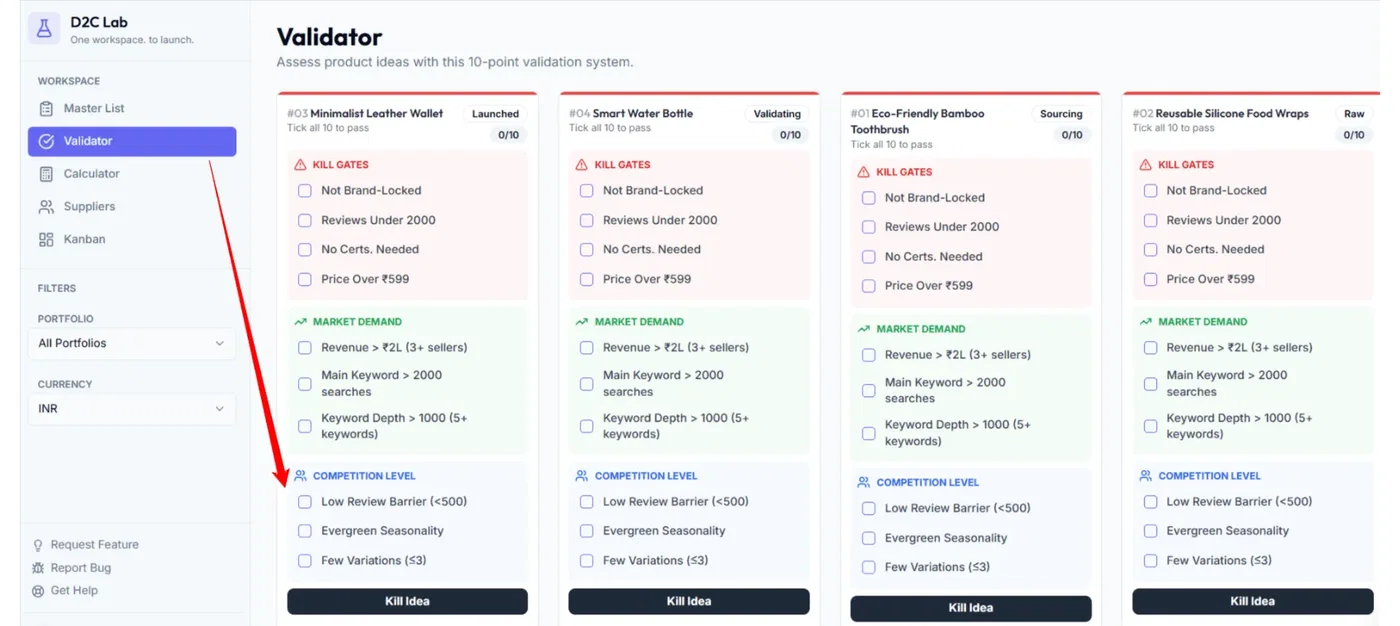
Competition Level
3) Stage updates automatically
As soon as you start checking items:
Stage moves from Raw → Validating
When everything is checked:
The idea is ready to move forward to profitability and sourcing.
Validate an idea (step-by-step)
Step 1 — Open the idea card
Find your idea in the Validator grid.

Step 2 — Start with Kill Gates
Kill Gates are your non-negotiables.
If an idea fails here, don’t overthink it — kill it and move on.
Step 3 — Check Market Demand
Confirm there’s real demand and buying intent.
Step 4 — Check Competition Level
Assess whether you can realistically compete and differentiate.
Step 5 — Decide
If it passes: finish the checklist and move to Calculator.
If it fails: Kill idea (does not delete it).
Kill / Revive (important)
Killing an idea
Killing an idea:
does not delete it,
just sets the stage to Killed,
keeps your notes and research for later.
Reviving an idea
If you change your mind later, you can revive it:
the stage returns from Killed back into your workflow.
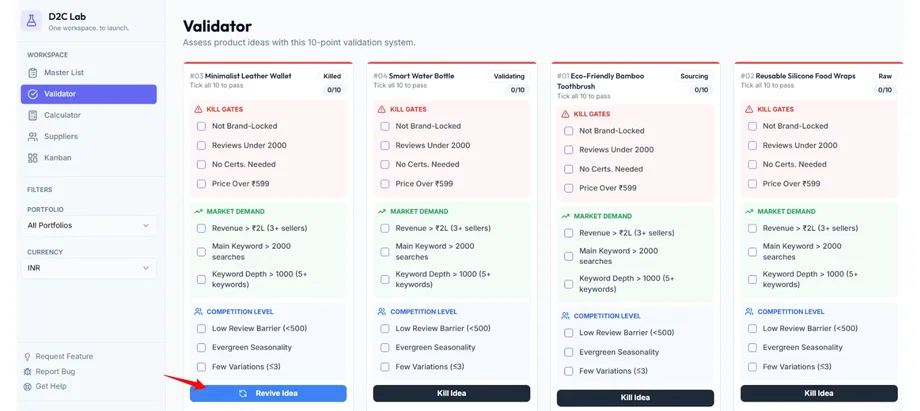

Tip: Use kill/revive confidently — it’s how you keep your product pipeline focused.
Editing checklist items
Default checklist items stay present, but you can customize them.
You can:
Add a new checklist item
Edit an existing item
Delete an item
Note: Edit/delete controls and “Add item” typically show when you hover (to keep the card clean).
Best practices (fast and effective)
Keep validation quick: 5–10 minutes per idea.
Kill early. If it fails Kill Gates, don’t move it forward.
Use notes to capture the “why” behind your decision.
Don’t aim for perfection. Aim to eliminate weak ideas fast.
What happens next
Once an idea is validated:
Go to Calculator → model unit economics (stage becomes Calculating)
Add suppliers when the numbers make sense
Related articles
Kill gates explained (how to kill / revive quickly)
Model profitability (Calculator)
Stages explained (Raw → Launched + Killed)